Sunday, March 27, 2011

A few of my favorite new features in Silver Efex Pro 2

There are many wonderful new features in Silver Efex Pro 2. Be sure to check out the Silver Efex Pro 2 section on the Nik Software website. If you scroll to the bottom of the page, you will notice a chart. All the links highlighted in orange are new features with descriptions.

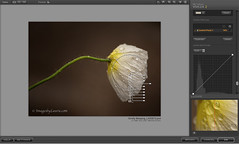
One of my favorite new features are the new algorithms under the Brightness, Contrast and Structure sliders that allow me to selectively adjust the different tonalities throughout the image without losing detail. Be sure to click on the arrow or the text to expand the sections under each slider to reveal the new options.


Of course the borders are a terrific new feature since you can keep the same style but change up the look by clicking on the Vary Border button. I used #11 border on this image.

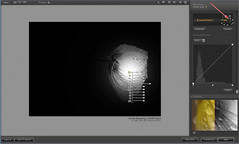
Converting color images to Black and White has never been more fun and easy to do!


Monday, March 21, 2011

Black & White or Color?

I've found that some of my best color images actually look great as black & white. 

Here is an example of an image of a couple of Cheetahs in color (using Color Efex Pro 3.0 and Viveza 2)

Here is the same image in Black and White (converted using Silver Efex Pro 2)

Monday, February 21, 2011

Using Control Points with the Zone System Map with Silver Efex Pro

Located in the Navigator Loupe (and Histogram window in Silver Efex Pro 2) is the Zone System Map which will help to show the different tonal ranges throughout your image. There are 11 Zones - from pure black to white. If you move your cursor over the different squares in the Zone System Map, you will see areas in your image that will display hash marks which corresponds to the Zone that is being highlighted. By using a Control Point (as indicated in the image below), I have selected an area that I want to match Zone 6. By moving the Brightness slider on the Control Point, (either to the right to lighten the area or to the left to darken the area,) the hash marks will appear in the selected area indicating that it is now matching Zone 6. This is a wonderful feature to use when you want to match a particular tonal value in your image.

Here is an example of using a Control Point to select an area that I want to match to Zone 6.

Wednesday, February 16, 2011

Before and After: Taking a Picture and Creating an Image

I will often use the Midnight filter in Color Efex Pro 3.0 to remove background elements. You can selectively reduce parts of a background or remove most of it using Viveza 2 and Control Points to reduce the brightness in combination with the Midnight filter. Using the Brush feature in Photoshop is also a way to paint in the dark areas.

Here is an example of a dramatic before and after image.
As you can see from the Before vs. After, the transformation is very dramatic. Keep this in mind the next time you happen across a "moment" that might not be in the perfect setting. With a little enhancing using Nik Software, you can turn an average picture into a very special image.

Tuesday, August 17, 2010

Nik Tip: From Flat to Fabulous - Pro Contrast

Some of the best times to shoot outdoors is when you have some nice overcast so that the light is diffused and you don't have those harsh highlights or dark shadows. This will often leave us with images that are flat and don't have much contrast. One of the best filters to use to help bring out the detail is Pro Contrast. Here is an example:


Original
I used the Pro Contrast filter to globally enhance the entire image and then I used a Control Point to selectively remove the filter from the rocks in the background to retain the soft warm colors.
Final Image with Pro Contrast


Saturday, July 17, 2010

Telling a Story with your Photography - Before and After

I wanted to share with you how Nik Software can actually enhance the story that you're trying to tell with your photography. So many times, I have taken a shot that has something to say, but the image doesn't quit make it into my favorites. That is until I use Nik Software to help enhance the mood or emotion that I'm trying to convey to my viewers.

In this particular image, I was able to capture a sweet moment between the mother flamingo and her baby chick, but the image just didn't have that soft, moody effect that I was looking for. So here are the steps I took to enhance my image using Nik Software to get it to where it became a more endearing and tender moment.

Step 1: This is the original image. 

Step 2: Color Efex Pro 3.0 - Darken/Lighten Center to help darken the edges in a very natural vignette.


Step 3: Color Efex Pro 3.0 - Glamour Glow is used to soften the image and tone down the background. 

Step 4: Viveza 2 - Shadow Adjustment is used selectively with a Control Point on the baby chick's face to help remove some of the shadow.


Step 5: Sharpener Pro 3.0 - Just a little sharpening on the eyes for detail. This time, I used the Brush feature with Photoshop to paint just the eyes.

Remember... when you're out there shooting, be patient, keep both eyes open and be ready to capture the moment. Then take your image into your digital darkroom and enhance the emotion or effect you're trying to evoke with your image by using Nik Software for a happy ending.

If you have any images that you would like to share with before's and after's, we'd love to see them! Just post them on our Nik Software Group on Flicker . Also, I will be demonstrating "live" how I created this final image in my upcoming Critters and Creature Webinar .

--Laurie
Nik Software 

Sunday, June 6, 2010

Tip of the Week - What is the Area of Influence?


We often get the question... when I use a Control Point, what does that circle do? Well, that circle is what we refer to as the "Area of Influence" because it analyzes color, tonality and detail within that area.

To demonstrate, it is sometimes easier to show how this works visually. I am using Viveza 2 to show how I use the Control Point to increase the Structure in my flower by increasing the size of my top slider to include the flower.
Area of Influence_01


By selecting the mask, (located in the Control Point List section), you can see where the white area has the filter applied to it and the black area does not. You can move your Control Point or increase and decrease your Area of Influence slider to change the area being effected.

Area of Influence_02b


Here are a few places where you can find helpful information about our award-winning U Point technology.

U Point Technology Website

Nik Software Website

Visit our Learn section where you can view free online tutorials and sign up for our "live" webinars.
Posted at 10:36AM, 6 June 2010 PDT ( permalink | edit )