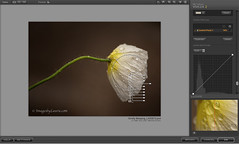
We often get the question... when I use a Control Point, what does that circle do? Well, that circle is what we refer to as the "Area of Influence" because it analyzes color, tonality and detail within that area.
To demonstrate, it is sometimes easier to show how this works visually. I am using Viveza 2 to show how I use the Control Point to increase the Structure in my flower by increasing the size of my top slider to include the flower.
To demonstrate, it is sometimes easier to show how this works visually. I am using Viveza 2 to show how I use the Control Point to increase the Structure in my flower by increasing the size of my top slider to include the flower.
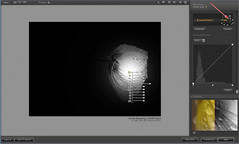
By selecting the mask, (located in the Control Point List section), you can see where the white area has the filter applied to it and the black area does not. You can move your Control Point or increase and decrease your Area of Influence slider to change the area being effected.
Here are a few places where you can find helpful information about our award-winning U Point technology.
U Point Technology Website
Nik Software Website
Visit our Learn section where you can view free online tutorials and sign up for our "live" webinars.
Posted at 10:36AM, 6 June 2010 PDT ( permalink | edit )

